spring security oauth2 单点登录功能 本篇将演示springsecurity 通过oauth2 实现github ,google 或其他的授权服务的第三方授权登录功能;
以github为例来说明如何使用;
首先对于 我们自己搭建的项目来说就是 客户端角色 ,github 就是充当了 授权服务器 和 资源服务器 .
基本操作流程是
客户端 到 服务提供者(github) 申请client_id 和 client_secret
客户端的登录页面 要增加一个通过外部登录的按钮 (这里使用github登录),点击外部登录后携带client_id 和申请权限参数 重定向到 服务提供者(github) 的登录页面,登录成功后提示是否接受授权.
确定授权后,回调到客户端服务的回调处理地址,将返回的code 再请求授权服务器的换取 access_token 接口,返回access_token
获取access_token 后再调用资源服务器的获取用户信息的接口(因为是登录功能所以需要获取必要得用户信息) ,获取到必要得用户信息,将获取的用户信息设置到当前的登录的上下文中;
当然上面的步骤是一般的通用步骤,而spring securty 已经帮我们做好了大部分的功能。只需要通过比较小的配置就能完成这部分功能;
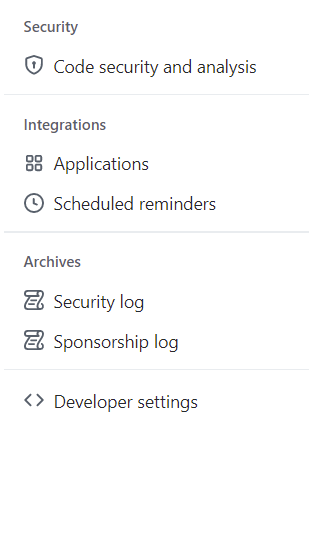
申请授权 登录github > 找到 个人设置下的 > Developer setttings
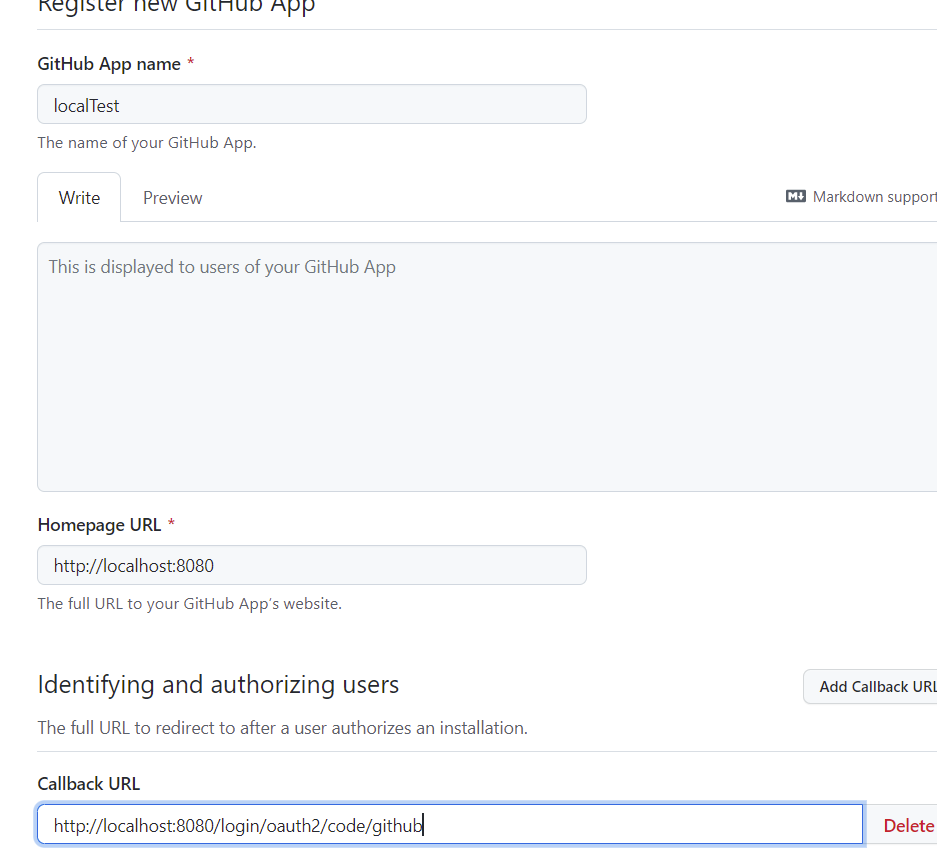
点击newGitHub App
填写必要的信息
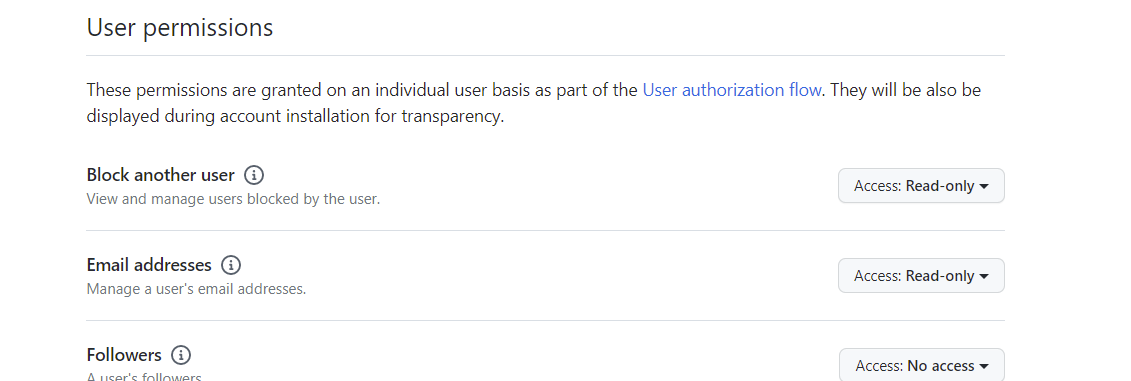
权限勾选 用户信息读取
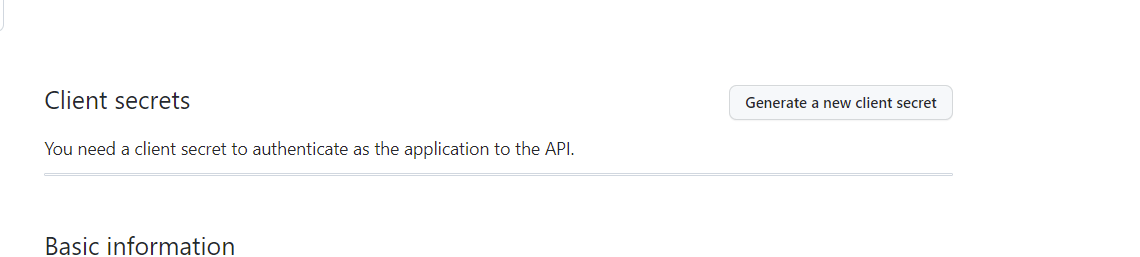
点击提交后
申请一个新的 secrets
到这里 就已经从授权服务器申请到3个信息
App ID: xxx
Client ID: xxx
Client secret: xxxxxxxxxxxxxxxxx
搭建服务 引入pom依赖,因只需要oath2 的客户端登录功能,所以跟oauth2 相关的包只需要一个 spring-boot-starter-oauth2-client 就可以了;
1
2
3
4
5
6
7
8
9
10
11
12
13
14
15
16
17
18
19
20
21
22
23
24
25
26
27
28
29
30
31
32
33
34
35
36
37
38
39
40
41
42
43
44
45
46
47
48
49
50
51
52
53
<?xml version="1.0" encoding="UTF-8"?> <project xmlns="http://maven.apache.org/POM/4.0.0" xmlns:xsi="http://www.w3.org/2001/XMLSchema-instance" xsi:schemaLocation="http://maven.apache.org/POM/4.0.0 https://maven.apache.org/xsd/maven-4.0.0.xsd"> <modelVersion>4.0.0</modelVersion> <parent> <groupId>org.springframework.boot</groupId> <artifactId>spring-boot-starter-parent</artifactId> <version>2.3.10.RELEASE</version> <relativePath/> <!-- lookup parent from repository --> </parent> <groupId>com.example</groupId> <artifactId>oauth-client</artifactId> <version>0.0.1-SNAPSHOT</version> <name>oauth-client</name> <description>oauth-client</description> <properties> <java.version>1.8</java.version> </properties> <dependencies> <dependency> <groupId>org.springframework.boot</groupId> <artifactId>spring-boot-starter-oauth2-client</artifactId> </dependency> <dependency> <groupId>org.springframework.boot</groupId> <artifactId>spring-boot-starter-security</artifactId> </dependency> <dependency> <groupId>org.springframework.boot</groupId> <artifactId>spring-boot-starter-web</artifactId> </dependency> <dependency> <groupId>org.springframework.boot</groupId> <artifactId>spring-boot-starter-test</artifactId> <scope>test</scope> </dependency> </dependencies> <build> <plugins> <plugin> <groupId>org.springframework.boot</groupId> <artifactId>spring-boot-maven-plugin</artifactId> </plugin> </plugins> </build> </project>
配置springSecurity 配置;
1
2
3
4
5
6
7
8
9
10
11
12
13
14
15
16
17
18
19
20
21
22
23
24
25
26
27
28
29
30
31
32
33
34
35
36
37
38
39
40
41
42
43
44
@EnableWebSecurity public class WebSecurityConfig extends WebSecurityConfigurerAdapter { @Bean public UserDetailsService userDetailsService() { UserDetails userDetails = User.builder().username("admin").password(passwordEncoder().encode("111111")).roles("SYSTEM").build(); InMemoryUserDetailsManager inMemoryUserDetailsManager = new InMemoryUserDetailsManager(); inMemoryUserDetailsManager.createUser(userDetails); return inMemoryUserDetailsManager; } @Bean public PasswordEncoder passwordEncoder(){ return new BCryptPasswordEncoder(); } @Override public void configure(WebSecurity web) throws Exception { super.configure(web); } @Override protected void configure(HttpSecurity http) throws Exception { http.authorizeRequests() .anyRequest().authenticated() .and(). formLogin().permitAll() .and().csrf().disable() .oauth2Login(); } }
目前只增加了一个.oauth2Login() 的配置;
注意:开启oath 登录主要的配置是 .oauth2Login(); 5.0后的版本中security 中已经废弃了 @EenalbeOAuth2SSO 注解了,不需要添加此注解;
编写配置文件
1
2
3
4
5
6
7
8
9
10
11
12
server: port: 8080 spring: security: oauth2: client: registration: github: client-id: xx client-secret: xxx
只是配置了一个 名称为github registration 的 注册, 增加client-id 和 client-secret 配置;
编写测试controller ,通过此url能获取到 Principal 用户信息;
1
2
3
4
5
6
7
@RequestMapping("/userInfo") @ResponseBody public String userInfo(Principal principal){ System.out.println(principal.getName()); return "1111"; }
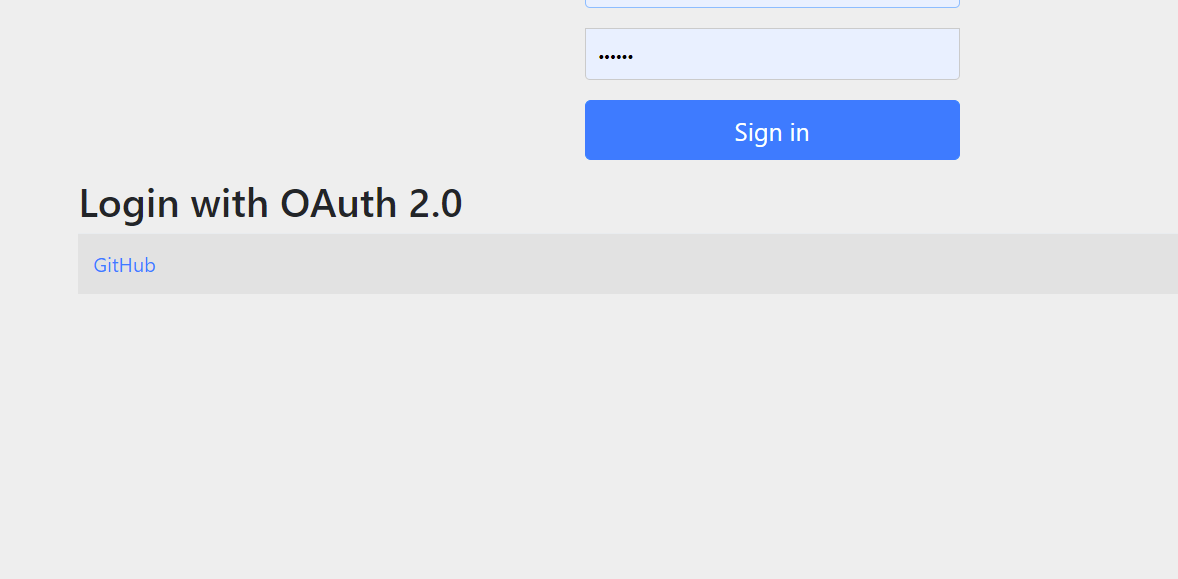
测试服务 启动服务,访问任何页面跳到登录页面.可以发现默认登录页面多了一个github的登录按钮
完成登录和授权后返回本服务
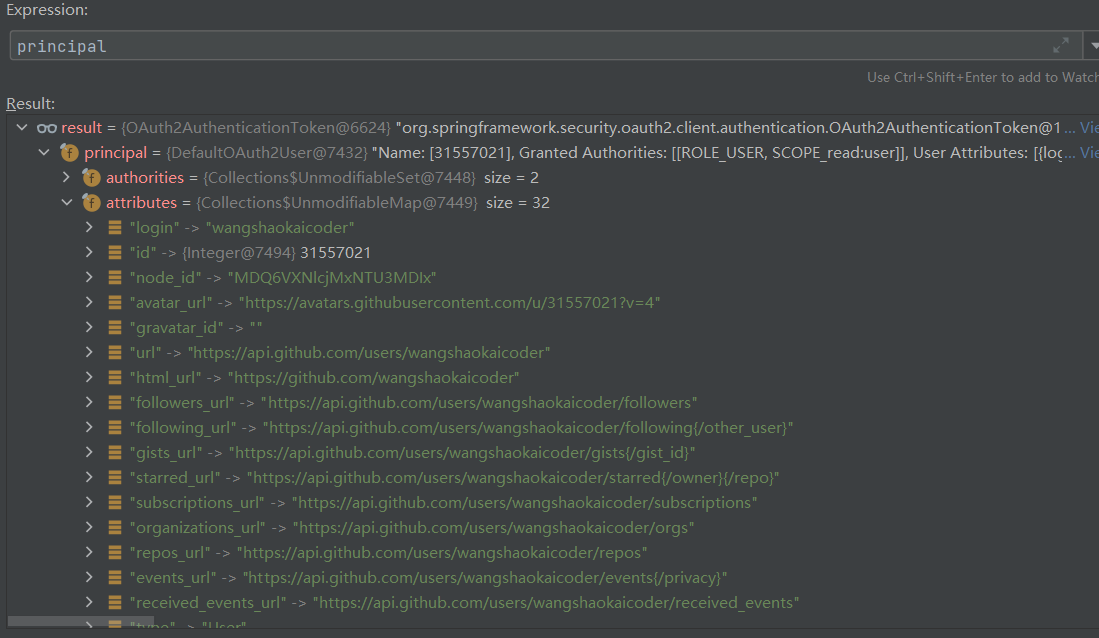
访问测试方法查看 Principal 信息
可以看到 Principal 的类型是 OAuth2AuthenticationToken
配置详解 yml配置 1 2 3 4 5 spring: security: oauth2: client: registration
此节点下包含2个配置项一个是 Registration 一个 是 Provider
Registration
provider 提供者名称 clientId clientSecret clientAuthenticationMethod 客户端请求方式 POST 或者 GET 等 authorizationGrantType 授权模式 redirectUri 重定向url scope 申请权限范围 clientName 客户端名称 Provider
authorizationUri 请求授权的url tokenUri 获取token的url,code 换取token userInfoUri 获取用户信息的api地址 userInfoAuthenticationMethod http请求方式 userNameAttribute 用户名的属性,从用户信息的返回信息中取那个属性值 jwkSetUri jwk的设置url,jwk是设置jwt的秘钥使用 issuerUri 指定jwt的issuser 的url 所以完成这个授权的过程是需要这些参数才能完成的,而github 却没有配置这些地址是怎么
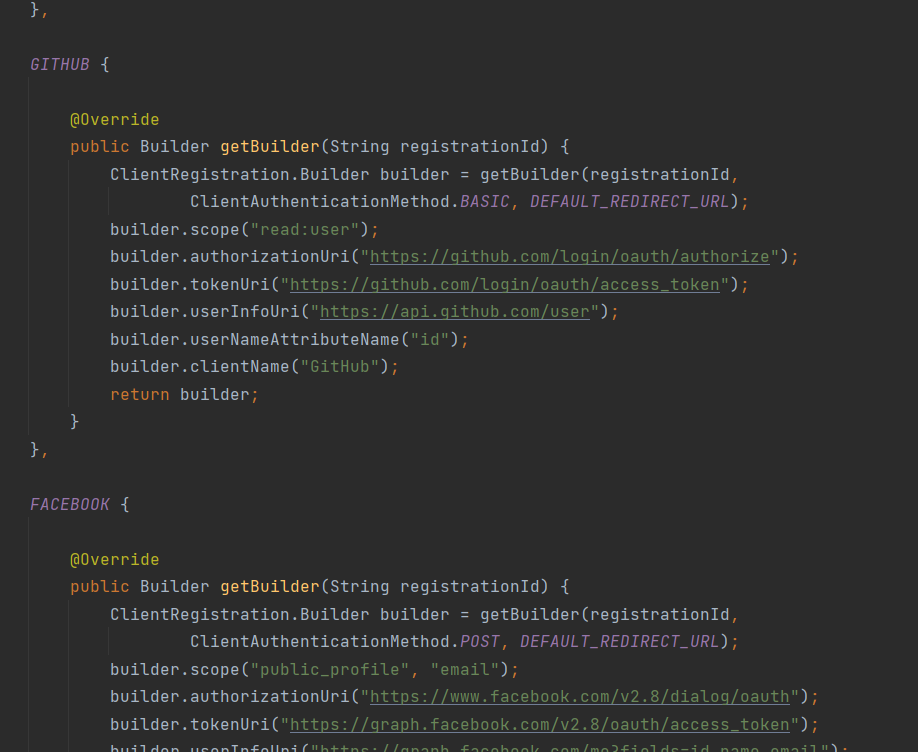
这是因为针对常用的网站的登录授权,内部帮我们添加了默认的属性设置具体可查看
1 org.springframework.security.config.oauth2.client.CommonOAuth2Provider;
也就是说针对这几个网站的一些配置已经帮我们添加了一些固定的配置,只需要配置clientid和clientsecret就可以了,而其他的网站是需要将配置完善的;
oauth2Login 配置 oauth2Login() 可以添加一些自定义项的配置
自定义oauth登录页 loginPage()
注意各个提供者的点击登录页面地址为 /oauth2/authorization/{regId}GitHub
设置重定向端点
修改回调的地址
自定义OAuth2User (参考官网)
.customUserType(GitHubOAuth2User.class, “github”);
1 2 3 4 5 6 7 8 9 10 11 12 13 14 15 16 17 18 19 20 21 22 23 24 25 26 27 28 29 30 31 32 33 34 35 36 37 38 39 40 41 42 43 44 45 46 47 48 49 50 51 52 53 54 55 56 57 58 59 public class GitHubOAuth2User implements OAuth2User { private List<GrantedAuthority> authorities = AuthorityUtils.createAuthorityList("ROLE_USER"); private Map<String, Object> attributes; private String id; private String name; private String login; private String email; @Override public Collection<? extends GrantedAuthority> getAuthorities() { return this.authorities; } @Override public Map<String, Object> getAttributes() { if (this.attributes == null) { this.attributes = new HashMap<>(); this.attributes.put("id", this.getId()); this.attributes.put("name", this.getName()); this.attributes.put("login", this.getLogin()); this.attributes.put("email", this.getEmail()); } return attributes; } public String getId() { return this.id; } public void setId(String id) { this.id = id; } @Override public String getName() { return this.name; } public void setName(String name) { this.name = name; } public String getLogin() { return this.login; } public void setLogin(String login) { this.login = login; } public String getEmail() { return this.email; } public void setEmail(String email) { this.email = email; }
源码分析 打开debugger 配置
查看当前生效的过滤器链
1 2 3 4 5 6 7 8 9 10 11 12 13 14 15 16 17 18 19 20 21 22 Security filter chain: [ WebAsyncManagerIntegrationFilter SecurityContextPersistenceFilter HeaderWriterFilter LogoutFilter OAuth2AuthorizationRequestRedirectFilter OAuth2LoginAuthenticationFilter UsernamePasswordAuthenticationFilter DefaultLoginPageGeneratingFilter DefaultLogoutPageGeneratingFilter RequestCacheAwareFilter SecurityContextHolderAwareRequestFilter AnonymousAuthenticationFilter SessionManagementFilter ExceptionTranslationFilter FilterSecurityInterceptor ]
OAuth2AuthorizationRequestRedirectFilter 和 OAuth2LoginAuthenticationFilter 作为入口来查看;
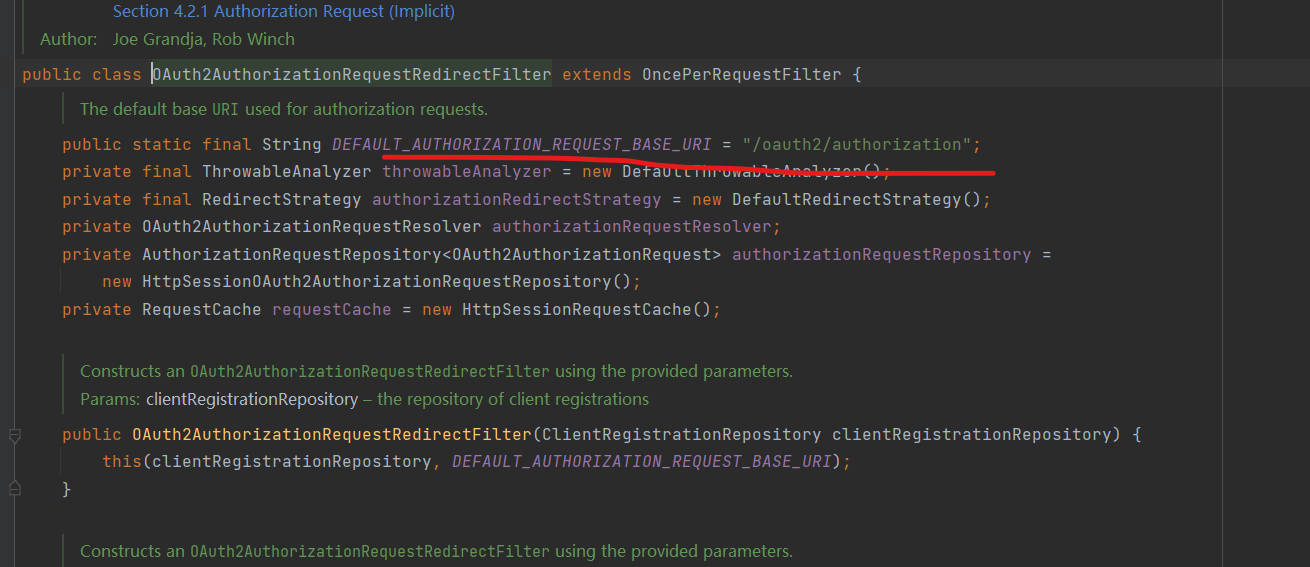
OAuth2AuthorizationRequestRedirectFilter OAuth2AuthorizationRequestRedirectFilter 的主要作为是处理登录的重定向到三方服务处理
默认是拦截 /oauth2/authorization/** 的请求
1 2 3 4 5 6 7 8 9 10 11 12 13 14 @Override protected void doFilterInternal(HttpServletRequest request, HttpServletResponse response, FilterChain filterChain) throws ServletException, IOException { try { //获取请求是否是oauth2认证的信息 OAuth2AuthorizationRequest authorizationRequest = this.authorizationRequestResolver.resolve(request); if (authorizationRequest != null) { //执行跳转 this.sendRedirectForAuthorization(request, response, authorizationRequest); return; }
OAuth2AuthorizationRequestResolver 默认只有一个实现类 DefaultOAuth2AuthorizationRequestResolver
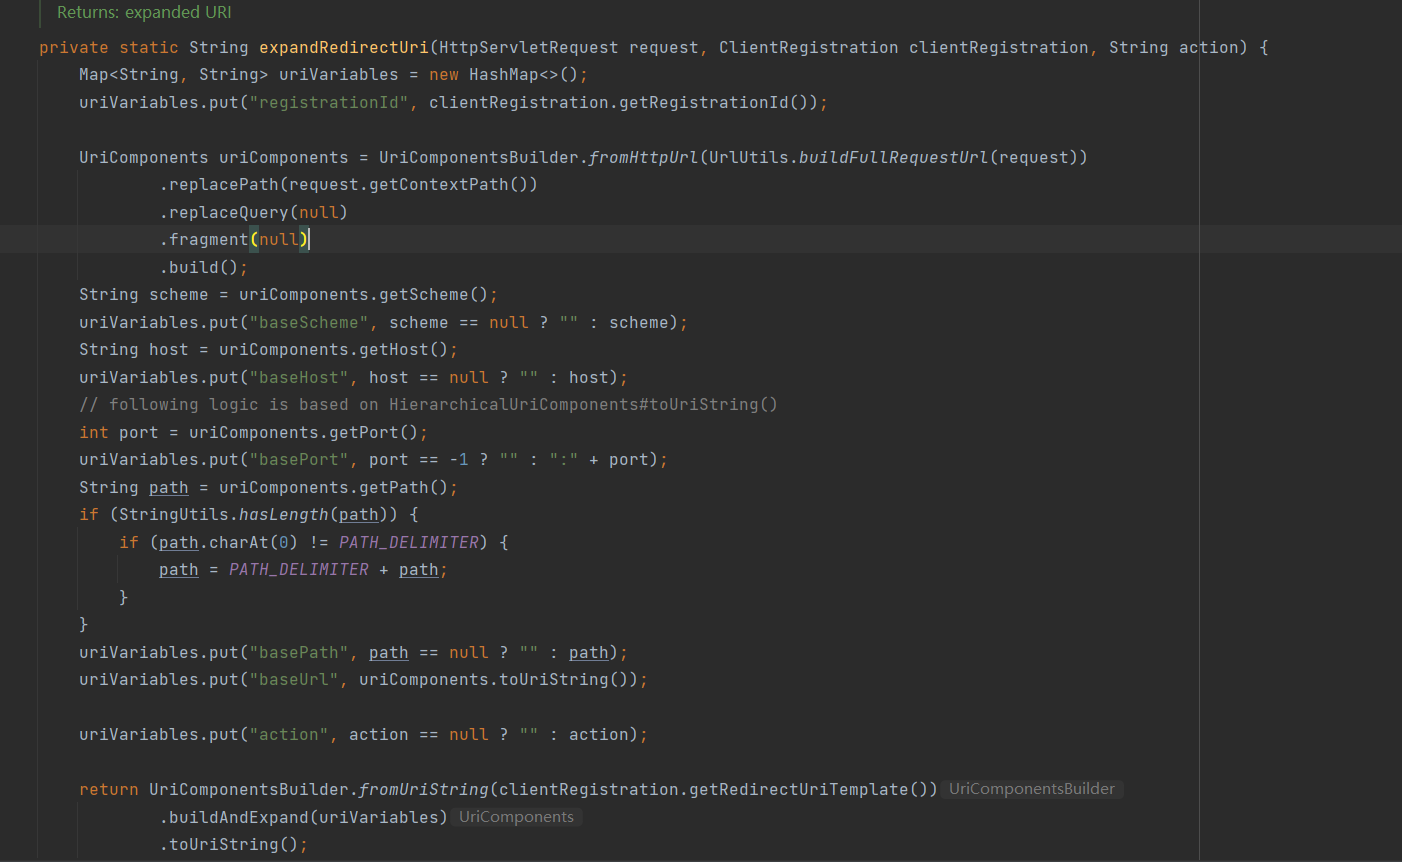
最终核心方法是 DefaultOAuth2AuthorizationRequestResolver#resolve 方法,根据当前请求的registrationId 封装成包含了oauth2认证信息的 OAuth2AuthorizationRequest
1 2 3 4 5 6 7 8 9 10 11 12 13 14 15 16 17 18 19 20 21 22 23 24 25 26 27 28 29 30 31 32 33 34 35 36 37 38 39 40 41 42 43 44 45 46 47 48 49 50 51 52 53 54 55 56 57 58 private OAuth2AuthorizationRequest resolve(HttpServletRequest request, String registrationId, String redirectUriAction) { if (registrationId == null) { return null; } // 从 clientRegistrationRepository 中获取当前id的客户端配置信息 //注意:clientRegistrationRepository 是可以拓展成通过数据库来存储的 ClientRegistration clientRegistration = this.clientRegistrationRepository.findByRegistrationId(registrationId); if (clientRegistration == null) { throw new IllegalArgumentException("Invalid Client Registration with Id: " + registrationId); } Map<String, Object> attributes = new HashMap<>(); attributes.put(OAuth2ParameterNames.REGISTRATION_ID, clientRegistration.getRegistrationId()); OAuth2AuthorizationRequest.Builder builder; //如果是授权码模式 if (AuthorizationGrantType.AUTHORIZATION_CODE.equals(clientRegistration.getAuthorizationGrantType())) { builder = OAuth2AuthorizationRequest.authorizationCode(); Map<String, Object> additionalParameters = new HashMap<>(); if (!CollectionUtils.isEmpty(clientRegistration.getScopes()) && clientRegistration.getScopes().contains(OidcScopes.OPENID)) { // Section 3.1.2.1 Authentication Request - https://openid.net/specs/openid-connect-core-1_0.html#AuthRequest // scope // REQUIRED. OpenID Connect requests MUST contain the "openid" scope value. addNonceParameters(attributes, additionalParameters); } if (ClientAuthenticationMethod.NONE.equals(clientRegistration.getClientAuthenticationMethod())) { addPkceParameters(attributes, additionalParameters); } //添加必要参数 builder.additionalParameters(additionalParameters); //如果是简化模式 } else if (AuthorizationGrantType.IMPLICIT.equals(clientRegistration.getAuthorizationGrantType())) { builder = OAuth2AuthorizationRequest.implicit(); } else { throw new IllegalArgumentException("Invalid Authorization Grant Type (" + clientRegistration.getAuthorizationGrantType().getValue() + ") for Client Registration with Id: " + clientRegistration.getRegistrationId()); } //拼装成url字符串 String redirectUriStr = expandRedirectUri(request, clientRegistration, redirectUriAction); builder .clientId(clientRegistration.getClientId()) .authorizationUri(clientRegistration.getProviderDetails().getAuthorizationUri()) .redirectUri(redirectUriStr) .scopes(clientRegistration.getScopes()) .state(this.stateGenerator.generateKey()) .attributes(attributes); this.authorizationRequestCustomizer.accept(builder); return builder.build(); }
最终返回获取到 OAuth2AuthorizationRequest 权限请求信息后,
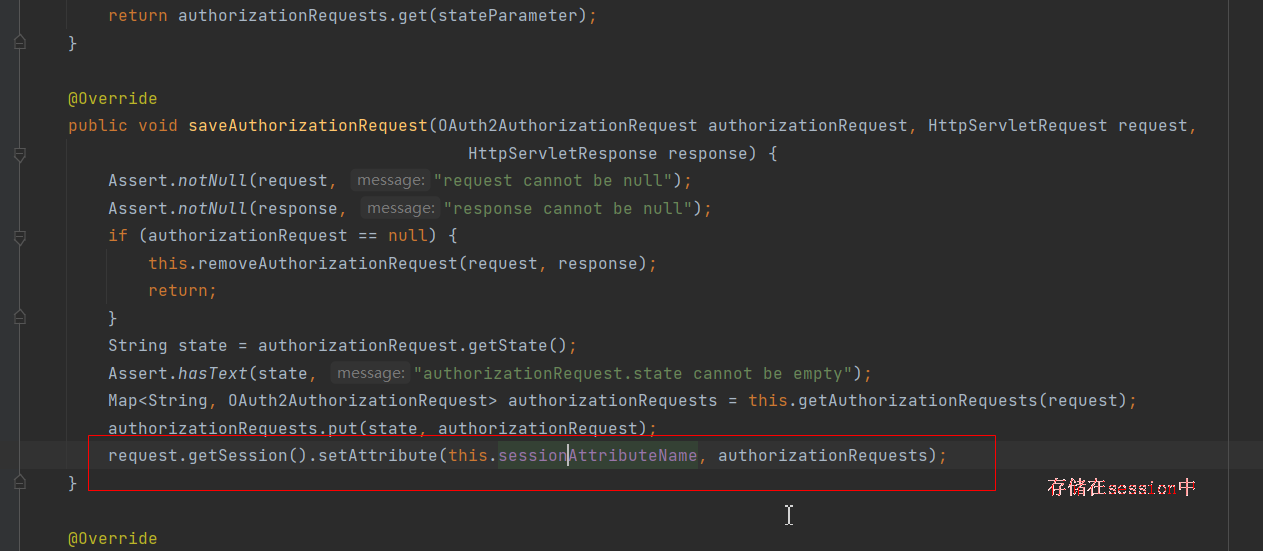
1 2 3 4 5 6 7 8 9 10 11 private void sendRedirectForAuthorization(HttpServletRequest request, HttpServletResponse response, OAuth2AuthorizationRequest authorizationRequest) throws IOException { if (AuthorizationGrantType.AUTHORIZATION_CODE.equals(authorizationRequest.getGrantType())) { this.authorizationRequestRepository.saveAuthorizationRequest(authorizationRequest, request, response); } //执行重定向 this.authorizationRedirectStrategy.sendRedirect(request, response, authorizationRequest.getAuthorizationRequestUri()); }
//处理信息的临时存储
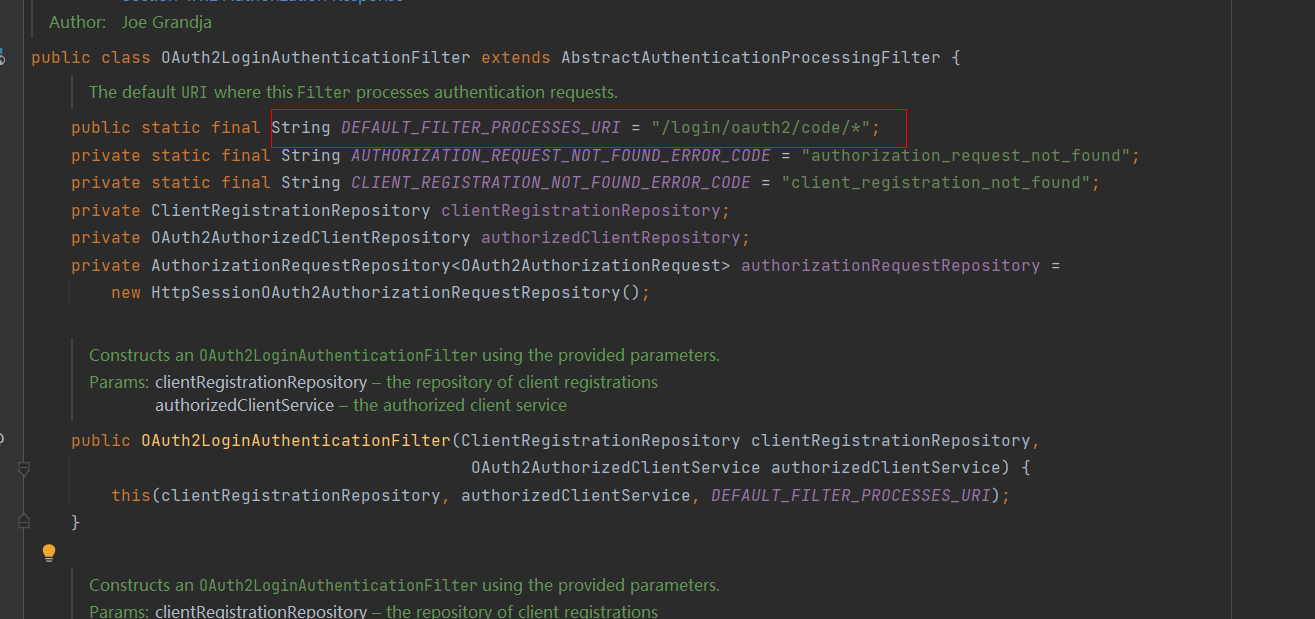
OAuth2LoginAuthenticationFilter 此类是继承 AbstractAuthenticationProcessingFilter 执行oauth2 登录的filter
注意:UsernamePasswordAuthenticationFilter也是继承 AbstractAuthenticationProcessingFilter;
默认处理此端点的回调信息;
当请求地址匹配 “/login/oauth2/code/* 的时候此过滤器会执行;
this.requiresAuthentication(request, response) 方法会返回true
接着执行 authResult = this.attemptAuthentication(request, response); 由子类实现
核心逻辑在 OAuth2LoginAuthenticationFilter#attemptAuthentication
1 2 3 4 5 6 7 8 9 10 11 12 13 14 15 16 17 18 19 20 21 22 23 24 25 26 27 28 29 30 31 32 33 34 35 36 37 38 39 40 41 42 43 44 45 46 47 48 49 50 51 52 53 54 55 56 57 58 59 60 61 62 63 64 65 @Override public Authentication attemptAuthentication(HttpServletRequest request, HttpServletResponse response) throws AuthenticationException { //参数转成map MultiValueMap<String, String> params = OAuth2AuthorizationResponseUtils.toMultiMap(request.getParameterMap()); //判断返回的参数正确 if (!OAuth2AuthorizationResponseUtils.isAuthorizationResponse(params)) { OAuth2Error oauth2Error = new OAuth2Error(OAuth2ErrorCodes.INVALID_REQUEST); throw new OAuth2AuthenticationException(oauth2Error, oauth2Error.toString()); } //从session中删除并且获取到 OAuth2AuthorizationRequest (重定向前放到session中的) OAuth2AuthorizationRequest authorizationRequest = this.authorizationRequestRepository.removeAuthorizationRequest(request, response); if (authorizationRequest == null) { OAuth2Error oauth2Error = new OAuth2Error(AUTHORIZATION_REQUEST_NOT_FOUND_ERROR_CODE); throw new OAuth2AuthenticationException(oauth2Error, oauth2Error.toString()); } String registrationId = authorizationRequest.getAttribute(OAuth2ParameterNames.REGISTRATION_ID); //获取客户端的注册信息 ClientRegistration clientRegistration = this.clientRegistrationRepository.findByRegistrationId(registrationId); if (clientRegistration == null) { OAuth2Error oauth2Error = new OAuth2Error(CLIENT_REGISTRATION_NOT_FOUND_ERROR_CODE, "Client Registration not found with Id: " + registrationId, null); throw new OAuth2AuthenticationException(oauth2Error, oauth2Error.toString()); } String redirectUri = UriComponentsBuilder.fromHttpUrl(UrlUtils.buildFullRequestUrl(request)) .replaceQuery(null) .build() .toUriString(); OAuth2AuthorizationResponse authorizationResponse = OAuth2AuthorizationResponseUtils.convert(params, redirectUri); Object authenticationDetails = this.authenticationDetailsSource.buildDetails(request); //组装成 OAuth2LoginAuthenticationToken OAuth2LoginAuthenticationToken authenticationRequest = new OAuth2LoginAuthenticationToken( clientRegistration, new OAuth2AuthorizationExchange(authorizationRequest, authorizationResponse)); authenticationRequest.setDetails(authenticationDetails); //获取 getAuthenticationManager 由多个provider 执行验证逻辑 OAuth2LoginAuthenticationToken authenticationResult = (OAuth2LoginAuthenticationToken) this.getAuthenticationManager().authenticate(authenticationRequest); OAuth2AuthenticationToken oauth2Authentication = new OAuth2AuthenticationToken( authenticationResult.getPrincipal(), authenticationResult.getAuthorities(), authenticationResult.getClientRegistration().getRegistrationId()); oauth2Authentication.setDetails(authenticationDetails); OAuth2AuthorizedClient authorizedClient = new OAuth2AuthorizedClient( authenticationResult.getClientRegistration(), oauth2Authentication.getName(), authenticationResult.getAccessToken(), authenticationResult.getRefreshToken()); this.authorizedClientRepository.saveAuthorizedClient(authorizedClient, oauth2Authentication, request, response); return oauth2Authentication; }
核心的验证provider是 OAuth2LoginAuthenticationProvider
重点关注此类的 authenticate 方法;
1 2 3 4 5 6 7 8 9 10 11 12 13 14 15 16 17 18 19 20 21 22 23 24 25 26 27 28 29 30 31 32 33 34 35 36 37 38 39 40 41 42 43 44 45 46 47 48 49 50 51 52 @Override public Authentication authenticate(Authentication authentication) throws AuthenticationException { //类型转换 OAuth2LoginAuthenticationToken loginAuthenticationToken = (OAuth2LoginAuthenticationToken) authentication; // Section 3.1.2.1 Authentication Request - https://openid.net/specs/openid-connect-core-1_0.html#AuthRequest // scope // REQUIRED. OpenID Connect requests MUST contain the "openid" scope value. if (loginAuthenticationToken.getAuthorizationExchange() .getAuthorizationRequest().getScopes().contains("openid")) { // This is an OpenID Connect Authentication Request so return null // and let OidcAuthorizationCodeAuthenticationProvider handle it instead return null; } //由 authorizationCodeAuthenticationProvider 执行 authenticate 获取返回 OAuth2AuthorizationCodeAuthenticationToken OAuth2AuthorizationCodeAuthenticationToken authorizationCodeAuthenticationToken; try { authorizationCodeAuthenticationToken = (OAuth2AuthorizationCodeAuthenticationToken) this.authorizationCodeAuthenticationProvider .authenticate(new OAuth2AuthorizationCodeAuthenticationToken( loginAuthenticationToken.getClientRegistration(), loginAuthenticationToken.getAuthorizationExchange())); } catch (OAuth2AuthorizationException ex) { OAuth2Error oauth2Error = ex.getError(); throw new OAuth2AuthenticationException(oauth2Error, oauth2Error.toString()); } OAuth2AccessToken accessToken = authorizationCodeAuthenticationToken.getAccessToken(); Map<String, Object> additionalParameters = authorizationCodeAuthenticationToken.getAdditionalParameters(); //通过userService 获取 OAuth2User OAuth2User oauth2User = this.userService.loadUser(new OAuth2UserRequest( loginAuthenticationToken.getClientRegistration(), accessToken, additionalParameters)); Collection<? extends GrantedAuthority> mappedAuthorities = this.authoritiesMapper.mapAuthorities(oauth2User.getAuthorities()); OAuth2LoginAuthenticationToken authenticationResult = new OAuth2LoginAuthenticationToken( loginAuthenticationToken.getClientRegistration(), loginAuthenticationToken.getAuthorizationExchange(), oauth2User, mappedAuthorities, accessToken, authorizationCodeAuthenticationToken.getRefreshToken()); authenticationResult.setDetails(loginAuthenticationToken.getDetails()); return authenticationResult; }
OAuth2AuthorizationCodeAuthenticationProvider#authenticate()
1 2 3 4 5 6 7 8 9 10 11 12 13 14 15 16 17 18 19 20 21 22 23 24 25 26 27 28 29 30 31 32 33 34 35 36 37 38 39 40 41 42 43 @Override public Authentication authenticate(Authentication authentication) throws AuthenticationException { OAuth2AuthorizationCodeAuthenticationToken authorizationCodeAuthentication = (OAuth2AuthorizationCodeAuthenticationToken) authentication; OAuth2AuthorizationResponse authorizationResponse = authorizationCodeAuthentication .getAuthorizationExchange().getAuthorizationResponse(); if (authorizationResponse.statusError()) { throw new OAuth2AuthorizationException(authorizationResponse.getError()); } OAuth2AuthorizationRequest authorizationRequest = authorizationCodeAuthentication .getAuthorizationExchange().getAuthorizationRequest(); if (!authorizationResponse.getState().equals(authorizationRequest.getState())) { OAuth2Error oauth2Error = new OAuth2Error(INVALID_STATE_PARAMETER_ERROR_CODE); throw new OAuth2AuthorizationException(oauth2Error); } //accessTokenResponseClient 内部发送http请求去获取token的返回ccessTokenResponse 信息 OAuth2AccessTokenResponse accessTokenResponse = this.accessTokenResponseClient.getTokenResponse( new OAuth2AuthorizationCodeGrantRequest( authorizationCodeAuthentication.getClientRegistration(), authorizationCodeAuthentication.getAuthorizationExchange())); //返回信息封装 OAuth2AuthorizationCodeAuthenticationToken authenticationResult = new OAuth2AuthorizationCodeAuthenticationToken( authorizationCodeAuthentication.getClientRegistration(), authorizationCodeAuthentication.getAuthorizationExchange(), accessTokenResponse.getAccessToken(), accessTokenResponse.getRefreshToken(), accessTokenResponse.getAdditionalParameters()); authenticationResult.setDetails(authorizationCodeAuthentication.getDetails()); return authenticationResult; }
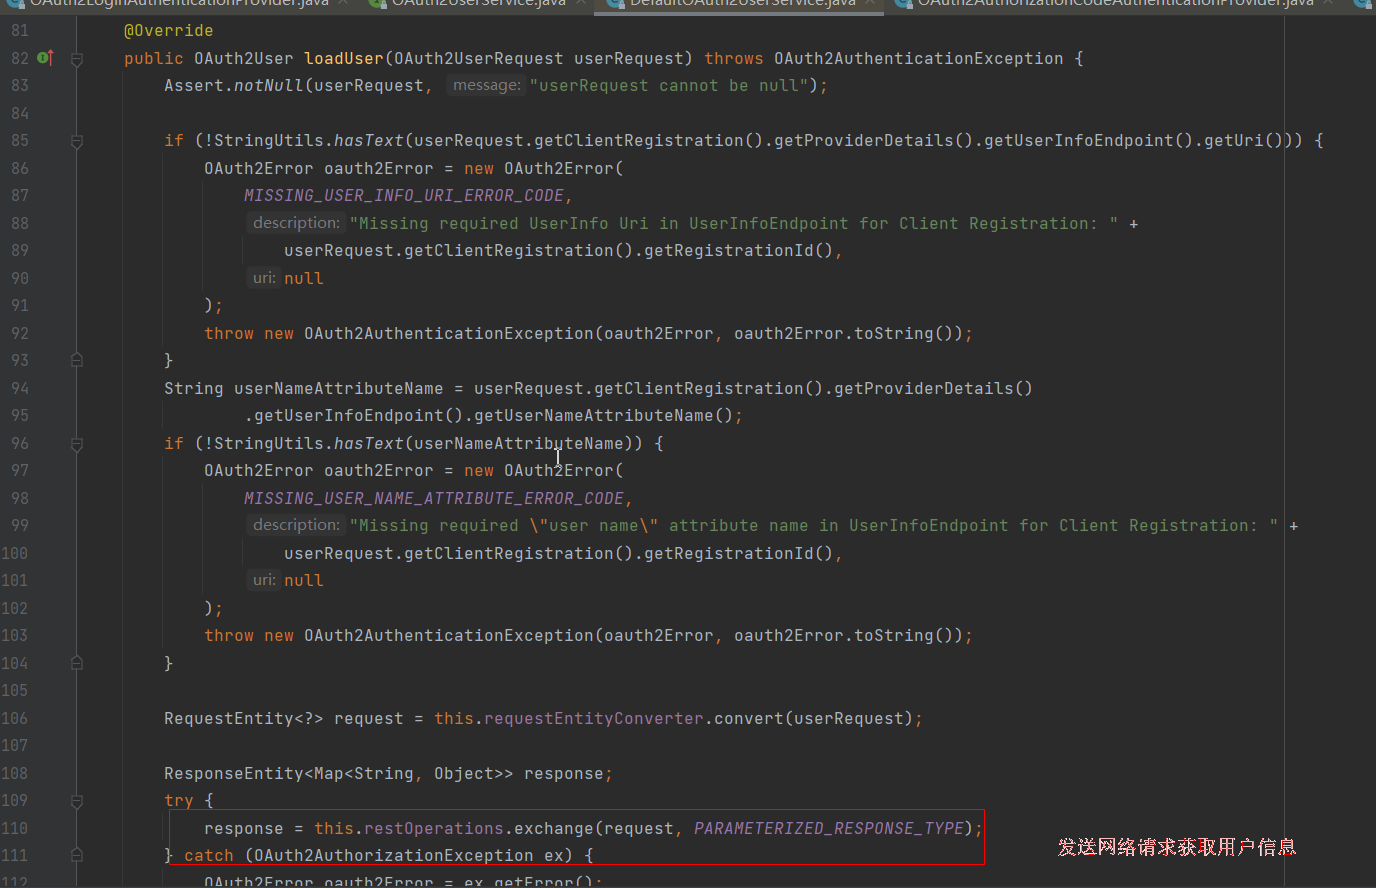
userService 类型是 DefaultOAuth2UserService
至此:基本的流程介绍完毕!